After four years of work, Geoid has released on Steam!
Here’s the release trailer:
After four years of work, Geoid has released on Steam!
Here’s the release trailer:
Geoid is officially releasing this spring! Here’s the new trailer:
This week was mostly spent on polish and bugfixing. One thing that really needed some polish was the secrets system. A few months back, I worked on some alternative ball styles, but wasn’t sure how to expose them to the player. I settled on a secrets system, where there are 20 or so “secret” pickups that are hidden throughout the game, which rewards exploration. In playtesting though, these were hidden well enough that most were never found.
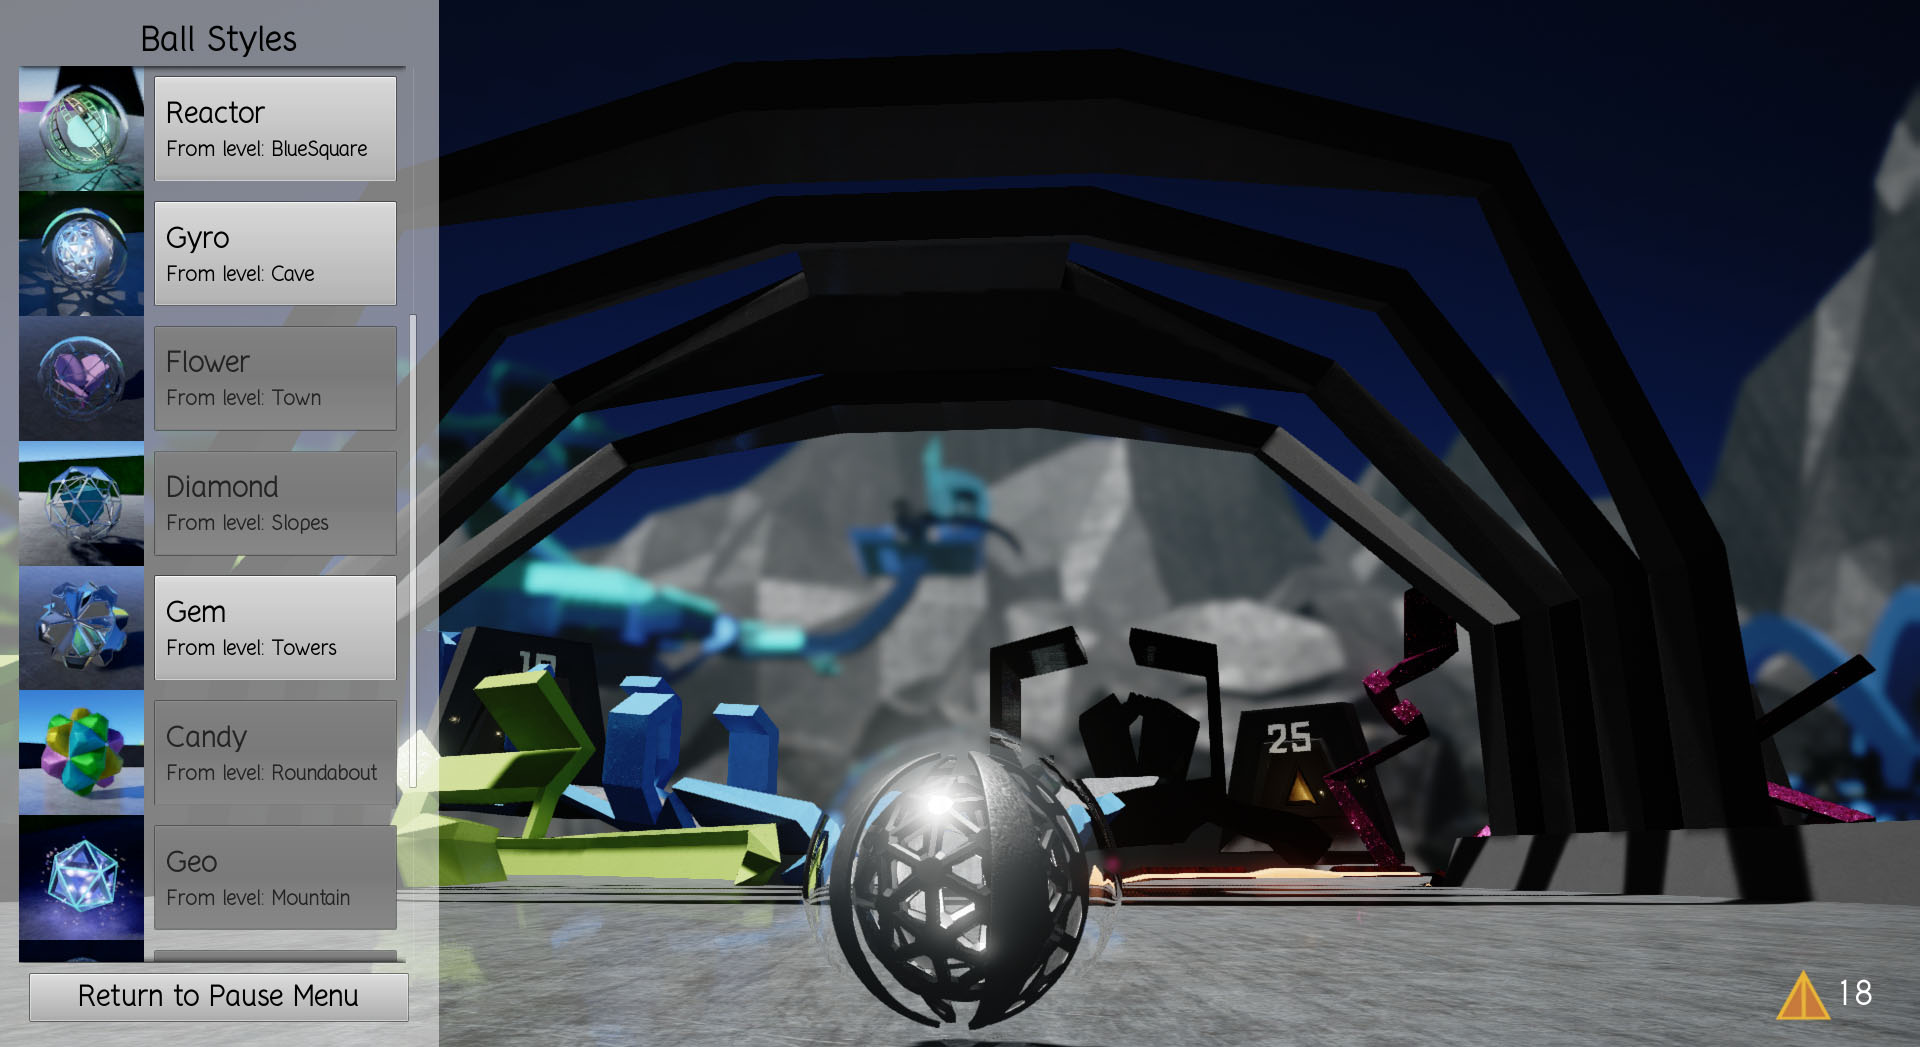
I decided that the best way to solve this without just giving them to the player outright would be to show some of the styles in the menu (greyed out when not found yet), along with which level they are located in. There are some extra styles hidden that aren’t in the menu at all as well, but this should at least give a good clue as to where to look, so players don’t need to waste time searching every single nook and cranny of the entire game.
One of my design goals with Geoid was for every level to have unique art. Because of this, I had to really streamline the art process early on. I developed several custom Blender addons to simplify the UV-mapping and exporting process, and came up with a few techniques that made creating hundreds of platform meshes a relatively painless process. To date, I have made 601 level-specific meshes (not including meshes for the hub world or game mechanics).

To create these meshes, I first design a level using a selection of prototyping meshes that I created just for this purpose. Here is a short example level that I’ve put together for demonstration purposes:

Here’s how this demo level plays with the placeholder prototyping meshes:
The next step is getting the level structure into Blender so that I can create meshes that fit this level perfectly – ideally these new meshes will be drop-in replacements for the prototype ones. Fortunately, Unreal Engine 4 has a function that exports an entire level’s geometry to an FBX file, which Blender can import.
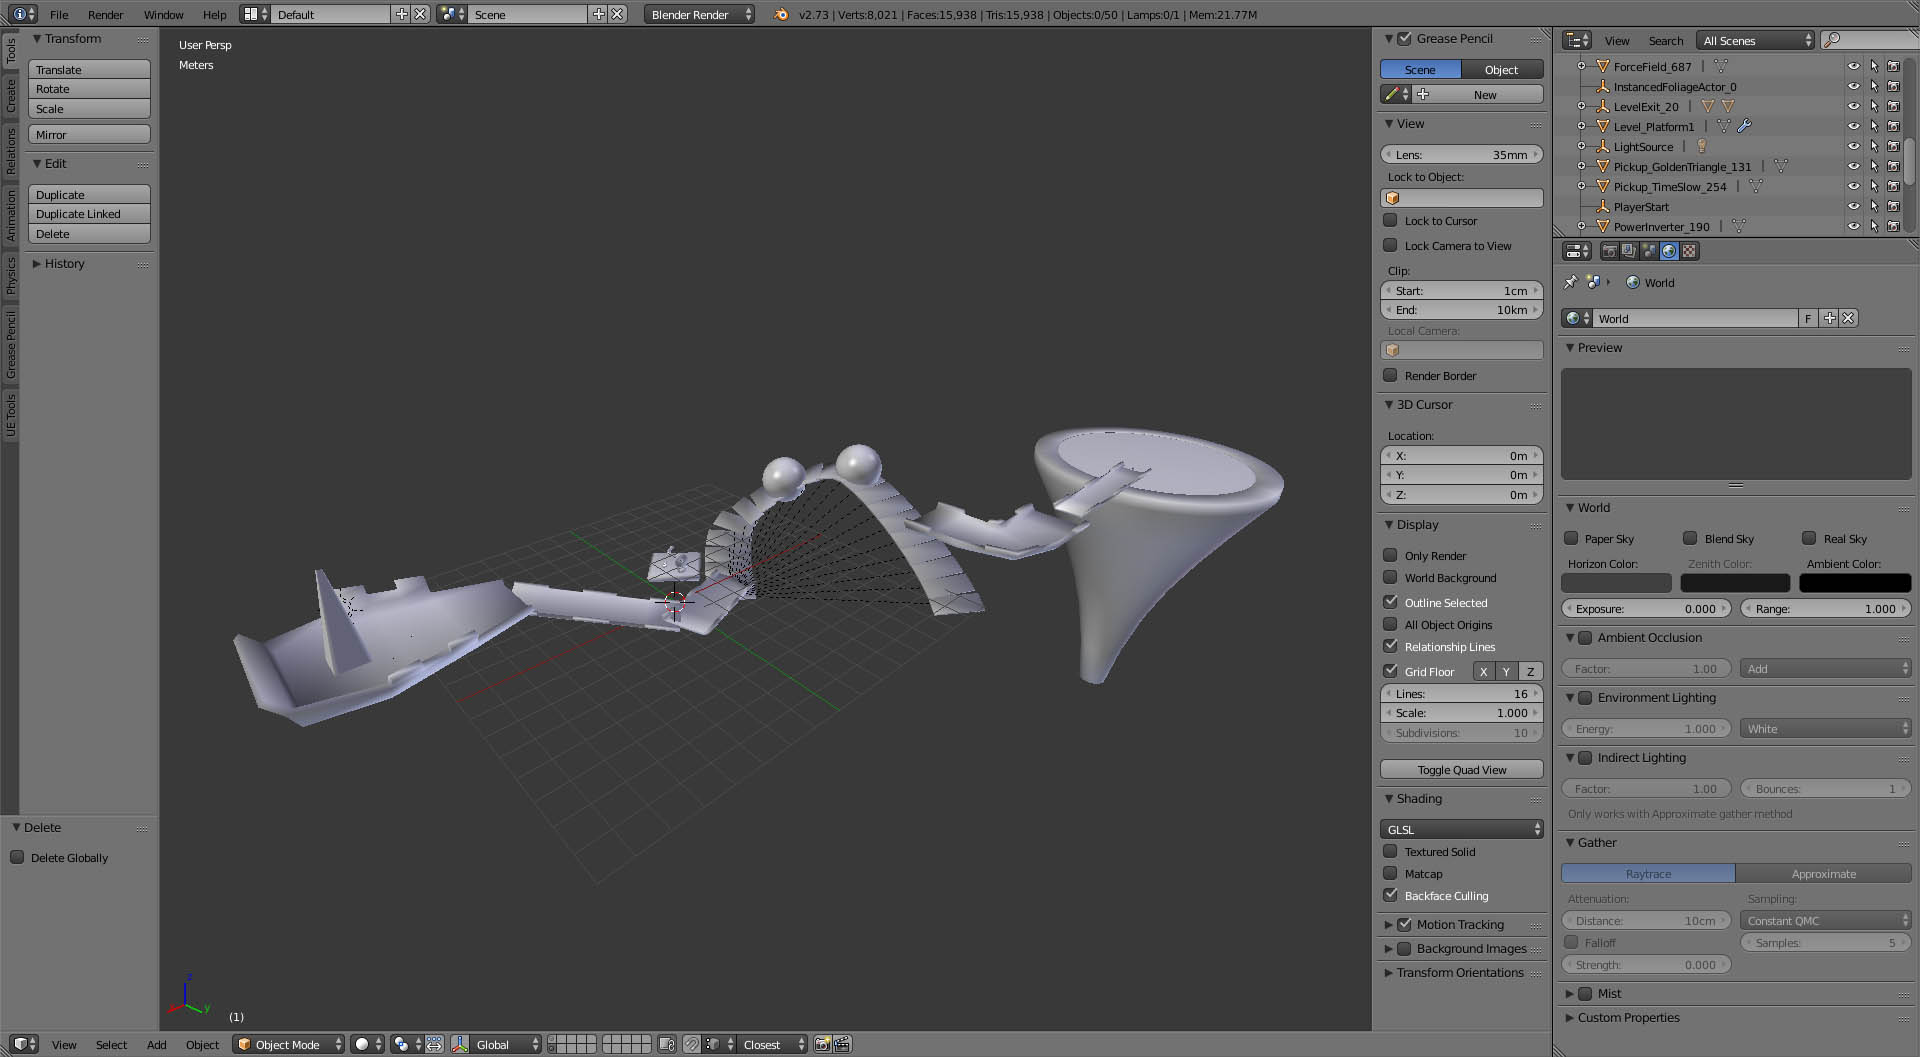
Now, there’s no point in doing anything with this directly, but now that it’s inside Blender, meshes can be created on top of them that match their scale and shape. I just use simple planes, sometimes combining platforms, sometimes separating them – whatever feels right.
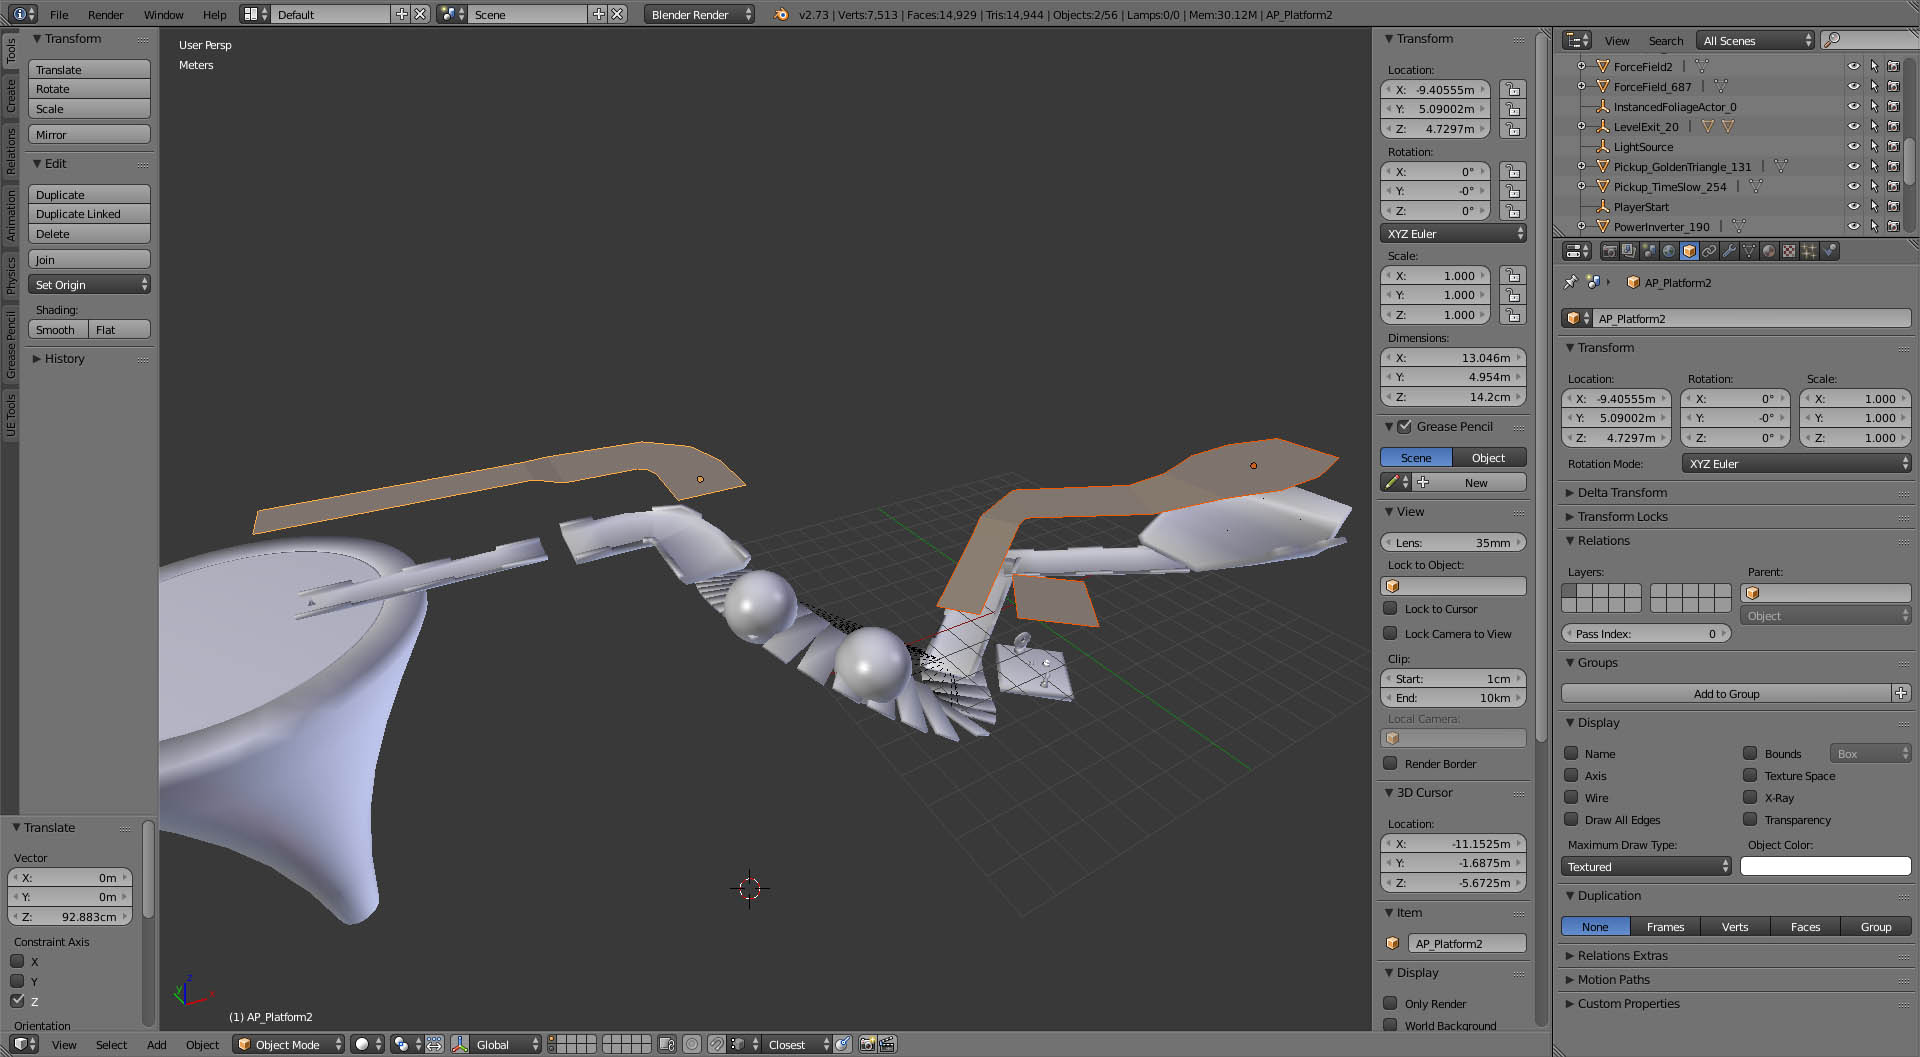
Once I have these simple planes set up at the right shape and scale, I start adding some flair to them, adjusting things like sidewalls and platform width depending on the intended difficulty. I also add extra geometric detail to make the platforms look more interesting. Here’s a time-lapse of this process:
https://www.youtube.com/watch?v=HEbvLu3stJI
Once I feel that the platforms are interesting enough, I use Blender’s solidify modifier to give them some volume:
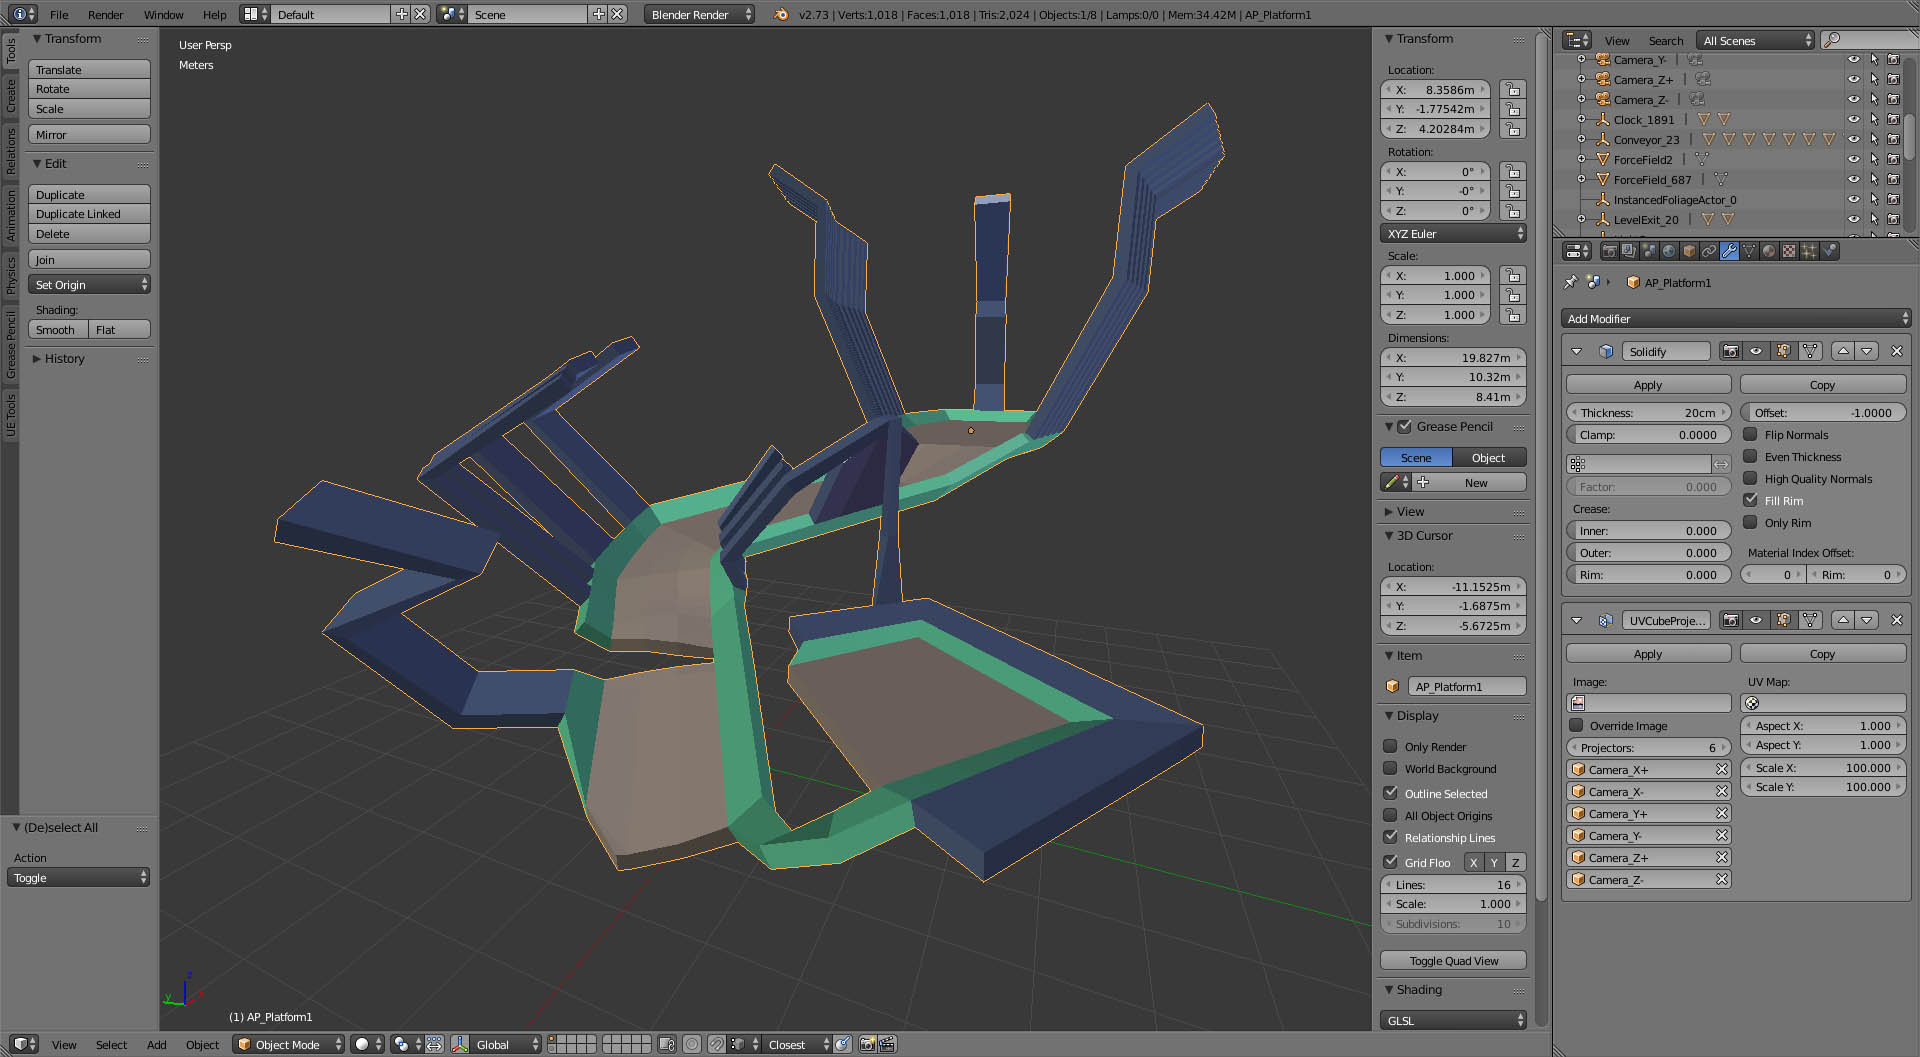
Then I do the other platforms. Here’s the final Blender file for the level:
 Finally, I import these meshes back into Unreal and tweak any mechanics that need to be adjusted to work with the new meshes. Usually most things work as-is. Here’s a gameplay video with the new meshes imported:
The solidify modifier in Blender really cuts down on the amount of work involved. Because the exporter applies modifiers before exporting, I can keep the platforms as simple planes, which makes it very easy to tweak meshes later for gameplay reasons – adding a hole to a platform for instance, takes longer to import and test than it does to actually make the geometry change. Newer Unreal Engine features such as auto-importing of assets also really speeds up the iteration process.
This isn’t the whole art process – the demo level would still need a proper material setup, as well as lighting and skybox art, but this process, along with the initial step of designing a fun level with the prototyping meshes, has been the most time-consuming part of game development, and also the most rewarding.
Marble Blast is a fantastic series. I have great memories of playing Marble Blast Gold as a kid, and Marble Blast Ultra on the 360 was a surprisingly good party game. However, due to the Marble Blast series being stuck in some kind of intellectual property quagmire, it has not been available for sale anywhere since 2011 (not unlike the reason why the Chip’s Challenge sequel sat unpublished from 1991 until 2015).
While there have been some fan attempts to inject some new life into Marble Blast, these attempts have been flawed for a few reasons: first, they’re very focused on punishingly difficult gameplay, and second, they’re using the Marble Blast name and engine. This combination unfortunately means that only a very small niche group of people will ever play them.
In 2013, I decided to fix this situation. I set out to re-imagine a rolling ball game that does things a bit differently. I wanted to avoid overused power-ups like ones that just make the ball roll faster, or ones that just make you jump really high. Instead, I wanted power-ups that change the flow of time, or let the player select a new, arbitrary gravity direction by touching an angled surface. And most importantly, I wanted a game that was infinitely moddable, particularly for player-designed levels, but also for player-designed new game mechanics.
There was really only one indie-friendly game engine that would work well for a rolling ball game back in 2013 however, and that was Unity. However, the free version of Unity looks like your average 3D game from 2002, and they had only recently allowed indie developers access to real-time shadows (well, real-time shadows from exactly one directional light, but still, it was better than nothing). From August 2013 until April 2014 I developed the game in Unity. I had a lot of serious issues with Unity, not the least of which is that I would need to implement a full level editor and scripting environment myself to provide modders with the tools they need (which is essentially what the Cities: Skylines folks had to do). I already had a prototype level editor that used IronPython for scripting game mechanics, but making it rock-solid with a good UI would be very time-consuming.
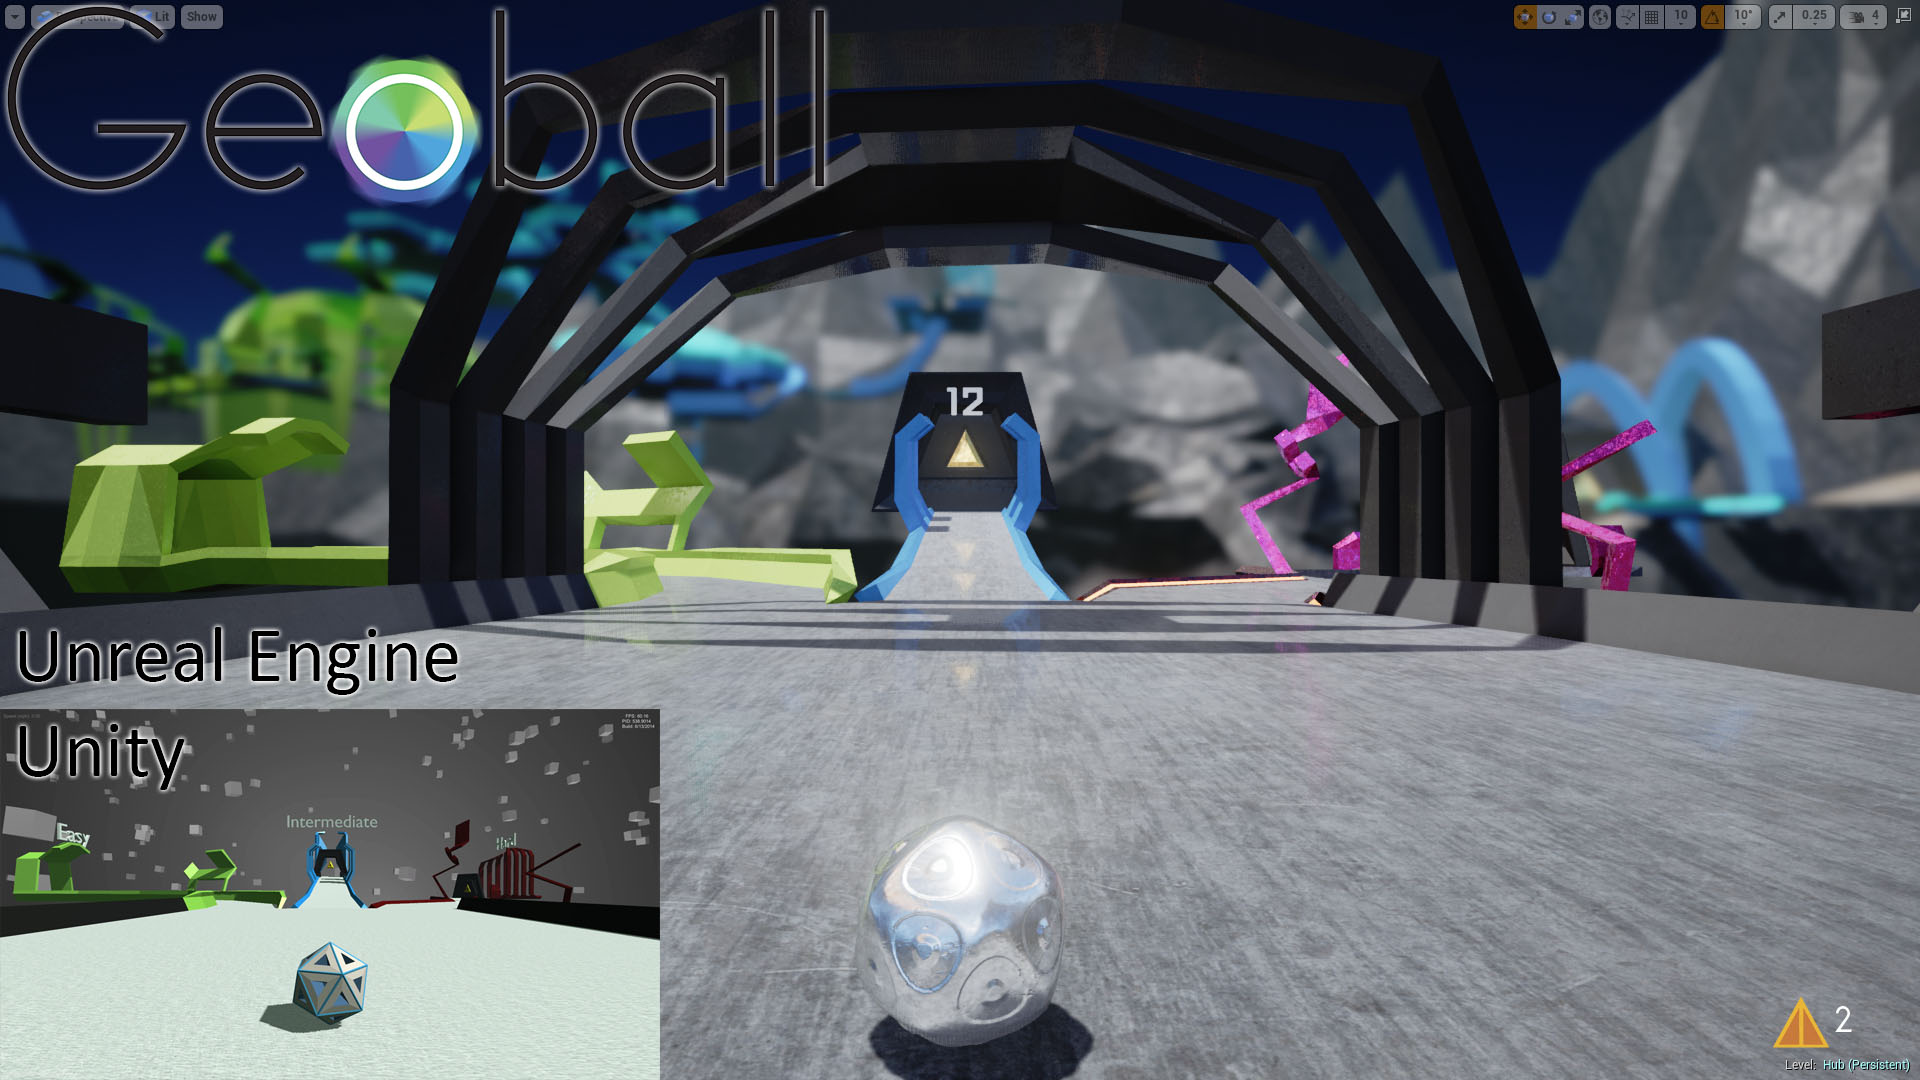 In March 2014, Epic released Unreal Engine 4, with a surprisingly affordable pricing structure (which they’ve since made just a royalty instead of a royalty and a monthly fee). I had been trying to figure out what to do with Unity, as the pro version was priced way beyond what I could afford, and my hope was that with Epic charging way less for Unreal, it would cause Unity’s pricing to drop to a reasonable level. I waited about six weeks to see if Unity would respond to their new competition, then gave up and began porting all of my assets to Unreal Engine. This was a real challenge, not the least of which because in the beginning there was a lack of good documentation and forum posts, and honestly, the initial Unreal Engine 4 release was a bit rough around the edges. I also had to learn C++, which isn’t the simplest of languages. But all of a sudden I had access to a triple-A lighting and shading system, built-in multiplayer net-code that actually works, and a way to provide a level editor to players without writing my own from scratch.
 It took months to get the game stable in Unreal, but once it was, development time returned to normal, and I was able to return to working on new content. If I’ve learned anything from the process of building a game from scratch, it’s that I really appreciate how lucky modders have it that all the base mechanics are stable when they’re messing with stuff. When you’re developing from scratch, early on in the process there’s always something broken that blocks you from figuring out if something will be fun or not.